Home owners constantly face the ever-daunting problem of renovating and improving property. While certain fixes require various handymen, there are many damages that can be fixed without having to hire any extra help. Here are 5 crucial DIY home improvement skills that will help you save time and money while polishing up your properties.
1. Spackling Drywall
(image via sfgate)
An almost unavoidable issue is damaged drywall. In most cases, drywall will pick up a few holes from objects that were hung or installed by the tenant. These holes, and the various dents and dinks, can easily be fixed by using a spackle compound. Spackle compounds come in a pre- mixed paste, as well as an unmixed powder that can be mixed with water to create the desired consistency.
Once you have the spackle, you will need to prepare the hole/dent by removing any debris. Smooth out the area with fine grit sandpaper. Once the area is smooth, fill the hole with the spackle material; a putty knife will make this easier. Using the putty knife, scrape off any excess spackle so that the wall is flat. Let the spackle dry for roughly 2-3 hours, then gently sand the area with fine grit sandpaper until it is consistent with the surrounding wall. Home improvement done!
2. Bathroom Caulking (the Simple Home Improvement that can Save you Thousands)
(image via sfgate)
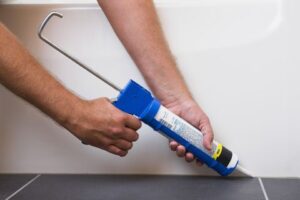
Old caulking can cause lots of leaks and excessive water damage to tiles and floors. As years go by, an uncaulked or inadequately caulked sink or bathtub can lead to thousands of dollars in water damage. Because caulk degrades over time, it’s recommended to replace it once every year or so. Don’t worry though, replacing the caulking is simple, and it usually takes less than 30 minutes.
First, scrape out any old caulk, and clean the area with rubbing alcohol. Simply apply the caulk on the edge of the tub, shower, sink, etc. To make the caulking look cleaner, you can use masking tape to create a precise, straight line of caulk. Once applied, you can use your finger to flatten out the caulk, removing any unwanted cracks or space. Give the caulking a day or two to dry before letting any water get on it.
3. Unclogging a Drain
(image via MT Drains and Plumbing LTD)
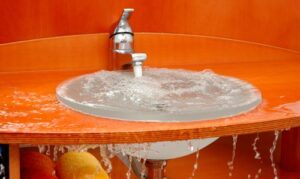
Drains can get clogged for a variety of reasons, but in most cases, unclogging a drain can be fairly easy! You can start by trying a mix hot water, vinegar and baking soda. This should help soften up any gunk stuck in the drain. Following the mixture up with some boiling water should wash everything away. If the drain is still clogged, a bent wire hanger can do a surprisingly good job of removing any gunk that’s clogged. Stick one end into the drain to dislodge any harder blockages. Run hot water down the drain to then wash any smaller bits away. You can also purchase clog removers such as Draino™ and Liquid Plumr™ to help break down clogs and clean drains.
If all else fails, it’s never a bad idea to check the trap. If accessible, unscrew the vertical u-shaped part of the sink pipes and clear any clogs on the inside. Be sure to place a bucket underneath to catch any water that is still stuck in the pipe.
4. Cleaning the Gutters
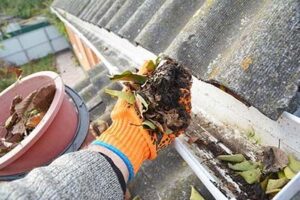
(image via feldco)
For houses and bigger units, it is crucial to clean out the gutters regularly. If the unit isn’t too high up, then you should be able to clean your gutters with just a ladder, a hose, and a few towels.
Set up the ladder so that you can see the inside of the gutter. Make sure that the ladder is secure. Then, use the towels to pick out any larger debris. Then use the hose to wash out any of the smaller gunk. Make sure to run water through the downspout to ensure that water is in fact flowing down through any blockages.
5. Painting

(image via improvenet)
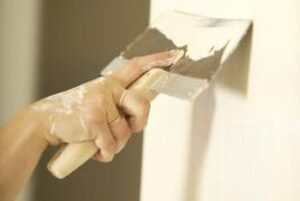
Painting a unit may seem like too much work, but with proper preparation this home improvement can save you a lot of money. First, any dents or holes in the walls should be cleaned up (scroll up to see how). Then, using 120 grit sandpaper, sand the surfaces you intend to paint. This will help the paint stick better and more evenly.
Use painter’s tape or masking tape to cover adjacent edges of the surface you are not painting. Then use a wet cloth/sponge over the surface to prep it for the paint. You may want to apply a primer before painting to make the colors more vibrant, but that is optional. If you do use primer, make sure to let it dry for at least 8 hours before painting. When applying the paint, start by painting 2-3 inches around the edges of the surface. For the main part, use a roller, moving in M or W shaped motions. Let the paint dry, then remove the painter’s tape.
If you’re a landlord looking for maintenance support, contact our property management team today.

Demetrios Salpoglou
Published January 17, 2019
Demetrios has pulled together the largest apartment leasing team in the Greater Boston Area and is responsible for procuring more apartment rentals than anyone in New England – with over 130k people finding their housing through his services. Demetrios is an avid real estate developer, peak performance trainer, educator, guest lecturer and motivational speaker.